Table tents and dessert cards: small formats that sell the last course
How to design table tents and dessert cards that actually get read: sizes, board weights, the two-sided tent layout, type at reading distance, and where they sit on the table.
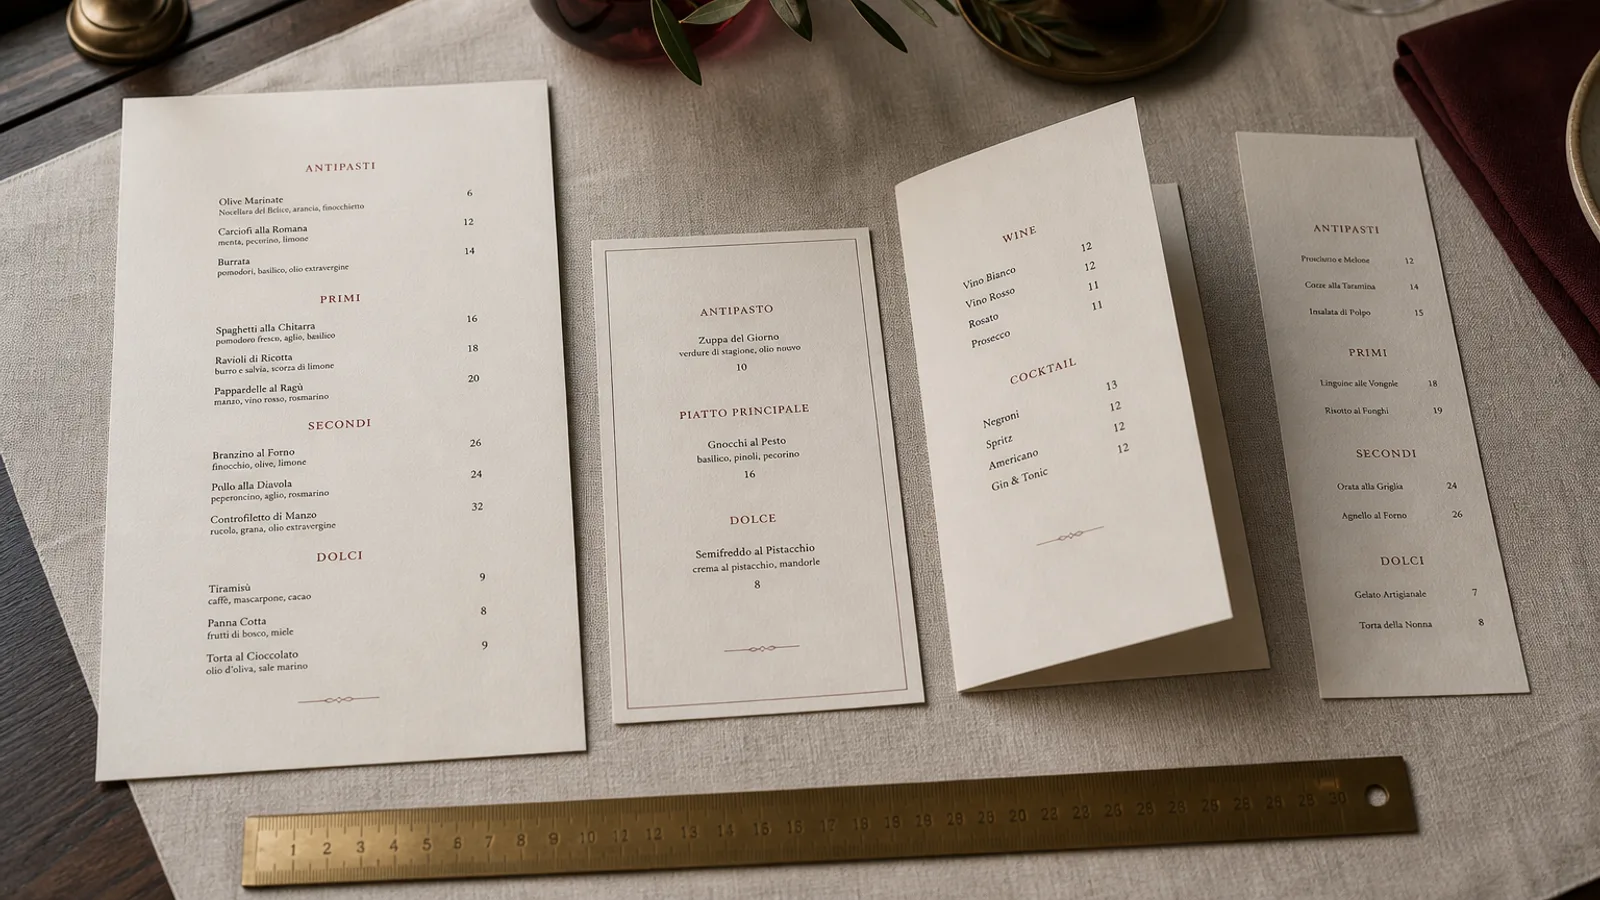
Dessert is the course with the highest margin and the lowest order rate, and the reason is usually mechanical: by the time plates are cleared, the menu is gone and nobody asks. A dessert card that arrives with the clearing, or a tent that has been on the table all along, fixes the mechanics. Both are tiny print jobs with outsized returns, and both are routinely designed as afterthoughts. Here is how to make them work: format, board, layout and placement.
Two objects, two moments
A dessert card is handed over. It is a flat piece, A6 to A5, brought to the table when mains are cleared, and it does one job: present six to ten desserts and the coffees and digestifs that go with them. A table tent stays put. It is a folded, self-standing card that sits on the table for the whole meal, so it is read in glances, from a distance, often upside down by half the party. Tents suit the things people decide impulsively: a dessert of the day, a cocktail, a wine by the glass.
They are not interchangeable. A tent with ten desserts and descriptions at 8 pt is unreadable from across a 70 cm table. A handed card with a single item looks like an advert. Match the object to the amount of content and the moment it is read.
Dessert cards: size, board and layout
A5 (148 × 210 mm) is the comfortable size for 8 to 10 desserts with one-line descriptions plus a short coffee and digestif list on the back. A6 (105 × 148 mm) works for 5 or 6 items with names and prices only. DL (99 × 210 mm) gives a tall single column that reads well in one hand. Whichever you choose, the card is held rather than laid down, so use 350 g board or heavier; there is no fold, so cracking is not a concern.
- Dessert names at 11 to 12 pt, one line of description at 9 pt, prices flush right on the name line. A dessert card can afford slightly larger type than the main menu, and it should: the room is darker at this point in the evening.
- Order the list to sell: the signature dessert first, the cheese or the shared item last, the sorbet somewhere in the middle.
- Back face: coffees, teas, dessert wines and digestifs, in three short groups. A pairing suggestion next to two or three desserts converts well.
- Uncoated cream or off-white board suits dessert cards; the warmth reads as indulgence. Soft-touch varnish adds the right hand.
Table tents: geometry and readability
A standard tent is an A-frame folded from a single sheet: two faces of A6 or 100 × 150 mm, plus a small base flap or a glued tab. A6 tents from a 105 × 296 mm strip (two A6 faces) stand about 148 mm tall and need 300 to 350 g board to stay upright in a room with a door that opens onto the street. Taller tents look impressive and fall over. Wider, lower tents at 150 × 100 mm landscape are more stable and read better from a seated position.
Reading distance on a tent is 50 to 80 cm, not 40, and the angle is oblique. Type has to be larger than on a hand-held menu: a headline at 20 to 28 pt, item names at 13 to 14 pt, one line of description at 10 pt, and a price. That gives room for three items per face, four at the very most. Print both faces so the tent reads from either side of the table, and either repeat the content or split it: dessert on one face, drinks on the other.
Set up the file as a single sheet with the two faces head-to-foot, so that when folded both are the right way up, and mark the fold as a crease line with a 6 mm clear zone. The base tab, if you use one, needs 20 to 25 mm and a second crease. Ask for matrix creasing on 350 g board; a scored-only tent cracks along the top edge, which is exactly where the eye lands.
Placement and the life of a tent
A tent works only if it is in the sightline. Place it towards the centre of the table but off the axis between two diners, angled 30 degrees so both faces are visible from the seats. On a two-top, that usually means against the wall side. Remove it when plates arrive if the table is small, and put it back with the clearing: a tent that has been in the way all meal is resented; one that reappears at the right moment is read.
Tents live hard. They get knocked, wiped, and stacked. Plan on replacing them every four to six weeks even on heavy board, and use that rhythm to rotate the dessert of the day or a seasonal cocktail rather than printing an evergreen tent that stops being noticed after a fortnight.
The numbers that justify the print
- A dessert at 8 € with a food cost around 25 % leaves 6 € of margin. Ten extra desserts a week is 60 € of margin, 240 € a month.
- A set of 40 A5 dessert cards on 350 g board printed digitally costs roughly 40 to 70 €. It pays for itself in the first fortnight.
- Twenty A6 tents, creased and folded, cost 30 to 60 €. One additional glass of wine a night covers it in three weeks.
Small format, deliberate design
The dessert card and the table tent are the two pieces of print that most directly move the bill, and they cost less than a tablecloth. Give them the same typeface and board as the main menu so they read as one family, size the type for the distance at which each is actually read, and change them often enough to stay noticed.
In Menu Atelier, a dessert card is simply an A5 single-sheet design in the same style as your main menu, printed on the same 350 g soft-touch board, so the pair arrives together and matches; you can preview both on a table in 3D to check that the small card holds its own next to the big one.